(serves 3)
Every place has its own way to prepare Korma but its features are universal. The curry is always cooked using almonds and/or cashew nuts as its base flavour, it is always light couloured and it is always mild. This last characteristic makes Korma the go to curry for anyone who are not into spicy food, and children. The Singapore method uses evaporated milk instead of yogurt or coconut milk to marinate the meat and this creates a distinct texture and taste unique to this method of preparation.
 Ingredients
- Chicken Thighs (4, deboned)
- Shallots (4)
- Ginger (1 thumb)
- Evaporated Milk (100 ml)
- Coconut Milk (150 ml)
- Almond Flour
- Curry Powder
- Cumin
- Chicken Cube (1)
- Cashew Nuts (50g)
Preparation (4-6 hours ahead)
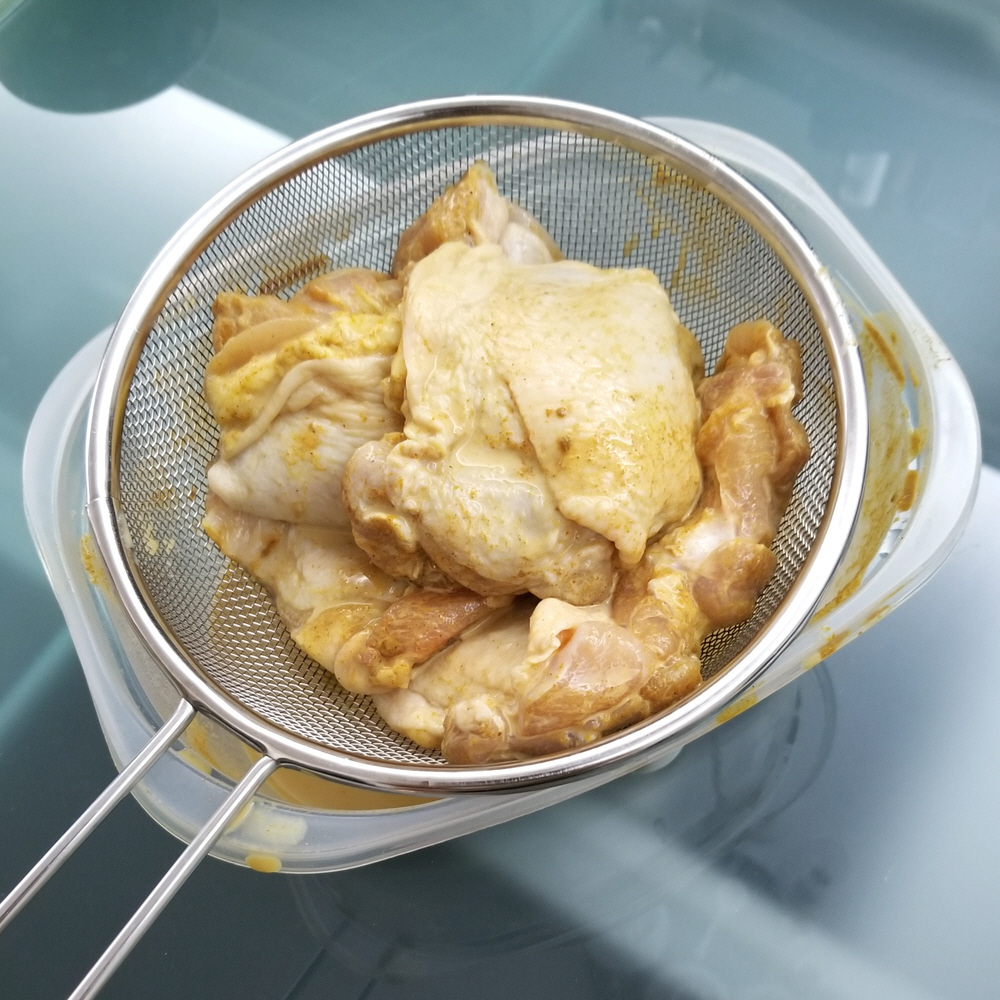
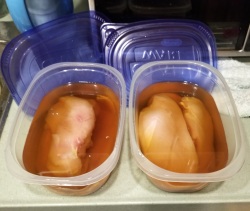
- Place the chicken into a bowl or plastic container and sprinkle in 2 heaped T of curry powder. Evenly coat each piece of chicken. Add 100 ml of evaporated milk, and mix well. Cover and leave in the fridge for a minimum of four hours.

Preparation
- Peel and cut each shallot in half. Julienne the shallots.
- Peel the ginger and cut first into slices 2mm thick. Next slice into strips and then finally cubes.
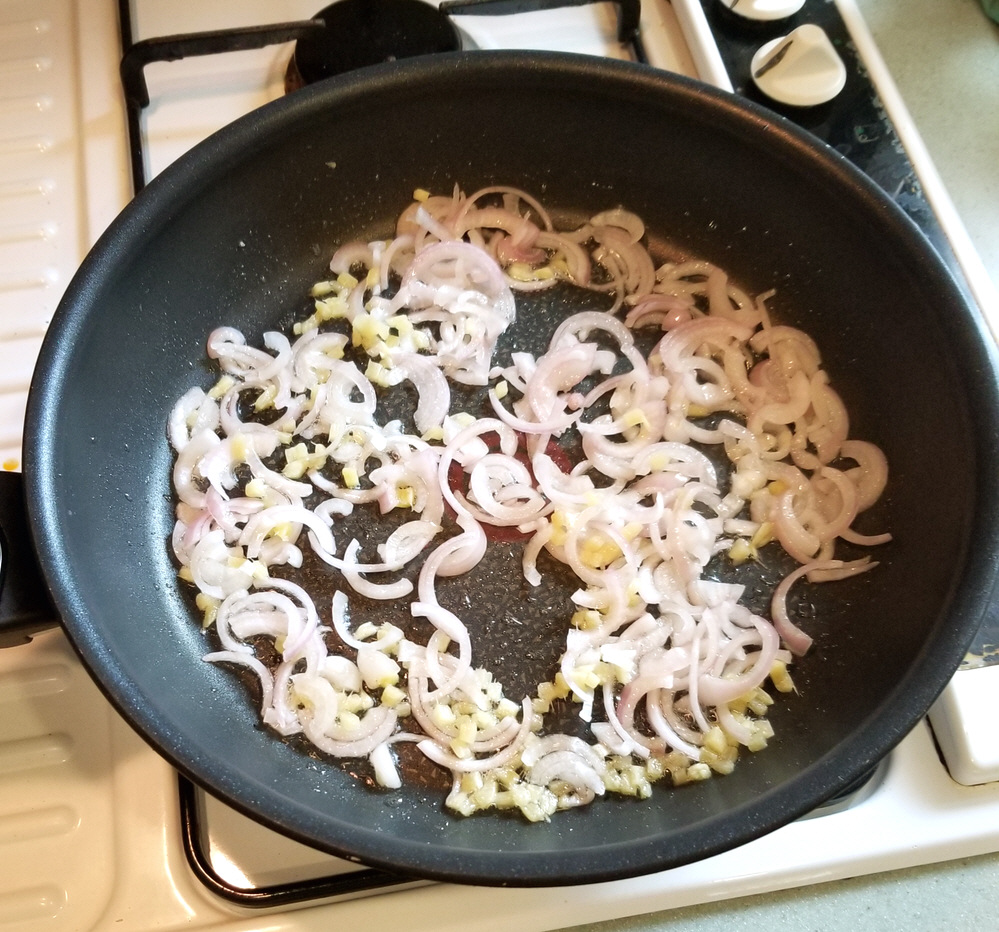
- Put 3T of oil in a large pan and add the sliced shallots and diced ginger. Pan fry until the shallots start to brown. Transfer the contents to a plate temporarily.
- Dissolve 1 chicken cube in 1 cup of water. Add the resulting chicken stock to the chicken and move the chicken about to wash off the marinade. Drain the chicken in a strainer over the container as shown above.
- Using the same pan, heat up 1 T of oil and pan fry the chicken. Start with a sizzling hot pan and fry the chicken skin side down for 2 minutes. Flip the chicken, turn the heat down and pan fry for a further 2 minutes.
- Transfer the chicken to a cutting board to cool.
- Pour the diluted marinade into the pan and return the shallots and ginger to the pan.

- Bring the pan to a simmer and sprinkle in 4T almond flour and 1T cumin. Stir until there are no clumps and leave on a simmer.
- By now the chicken should have cooled enough to touch. Cut each chicken thigh into about six pieces. Return the chicken together with any drippings back into the pan.
- Add 150 ml coconut milk, 50 g (1/4 cup) of roasted cashew nuts and 1t of sugar. Cover and simmer for an additional 10 minutes.
- Check if you wish to add salt before serving. Chop up 1 sprig of coriander and use it as a garnish.
Notes
- In case you are wondering what is curry powder,
 you can refer to the ingredients listed on the package of curry powder on the right. Curry powder is the base for making curries. It is not the same as Garam Masala, which is just a seasoning.
- If you’ll be making other dishes, you can prepare your korma ahead of time and just reheat to serve. It doesn’t taste any better if freshly made.
- The thicker parts of a chicken thigh will not be cooked from 4 minutes of pan frying, especially without a drop lid. That’s fine, simmering in the curry will finish the job. The idea is to caramelize the chicken and extract the oil and flavour from the skin.
- I find cutting the chicken using a pair of kitchen scissors easier than using a knife.
- Though its not part of the recipe, you should serve your korma with steamed rice or some kind of Indian bread.
Tags: Almonds, Cashews, Chicken, Coconut, Curry, Shallots
(serves 3 to 4)
Miso Stew or Miso Nabe is a winter dish that is popular in Hokkaido. The concentration of protein and carbohydrates in miso and soya milk creates a stew that is hearty and robust, giving it the power to keep the cold at bay. Every region has its own unique way of cooking their miso stew and there is no definitive cooking method or set of ingredients, though the meat is usually fish, pork or chicken. If you’ve never tired a Miso Stew don’t worry, my particular way of cooking Miso Stew is suitable to Western tastes.
Ingredients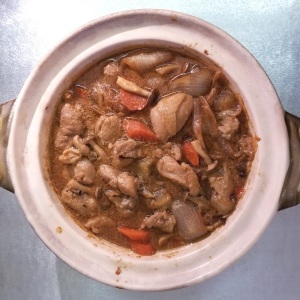
- Chicken Legs (2, with thigh)
- Red Miso (4T)
- Carrot (1)
- Onion (1)
- Mushroom (1.5 cups)
- Yam (1)
- Garlic (1T, minced)
- Mirin
- Sake
- Soy Sauce
- Soya Milk (unsweetened, 3/4 Cup)
- Maple Syrup
Preparation (the day before)
- Debone the chicken and cut the meat into bite sized chunks. Keep the bones in the freezer for use the next day.
- Mix in a large bowl 2T Red Miso, 2T Sake, 1T Mirin and 1T Maple Syrup until you get a paste. Stir in 1T of minced garlic.
- Place the chicken meat in the bowl and toss well until each piece is coated with the marinade. Cover the bowl with cling film and keep it in the fridge overnight.
Preparation
- Peel a yam and cut it into bit sized chunks. Place the yam pieces on a sheet of aluminium foil and drizzle them with 2T oil and 2T mirin. Wrap the yam up in the foil and place in a toaster oven set at 180oC (360oF) for twenty five minutes.
- Put 3T of oil in a large pan (or clay pot) and heat the pan until the oil is searing hot. Keeping the fire on high, pour in the chicken together with all the marinade. Stir fry.
- When the chicken begins to shrink, add 3/4 cup of soy milk and 3/4 of water. After a quick stir, pick out the chicken pieces and set them aside on a plate.
- When the contents of the pan come to a boil again, put the chicken bones in the pan, as well as 1T sugar, 1T Soy Sauce and 2T of Red Miso. Turn the fire down to bring the liquid in the pan to a low simmer.
- Peel a carrot and slice it into 1/8 inch thick oval pieces. Put the carrot slices in the pan.
- Peel an onion and cut it into 6 equal wedges. Place the onion in the pan. Cover the pan and simmer for about 15 minutes.
- Cut your mushrooms into appropriate size if you have chosen to use a big variety. I used Shimeji in the picture above and used them whole.
- When the carrot is no longer crunchy, add the mushrooms, chicken and yam to the pan. Cover and simmer for a further five minutes. Remove the chicken bones before serving.
Notes
- You’ll notice I specified Red Miso above. You can also use Hatcho Miso, but preferable not any of the white, yellow or golden varieties of Miso, for the unique flavour of miso dissipates into plain saltiness with cooking. For more information on Miso, you can refer to this post about Miso.
- Nabe (pronounced nar-bay) is not the Japanese word for stew. It refers to a shared hot pot, sort of like a fondue using soup.
- If don’t have any unsweetened soya milk, you can use plain milk instead.
- The reason you put in the carrots before the onion is carrot takes longer to soften. Don’t reverse the order of steps 5 and 6.
- One key element of this recipe is cooking the yam and chicken separately from the stew. Both chicken and yam taste better when cooked at high temperatures. You can of course choose to just boil everything in the stew, but the result will not be as good.
- Miso stew is best eaten with steamed rice as a staple, although you can use another type of staple, like noodles or bread. This stew is not meant to be eaten on its own.
- Instead of putting the bones in the freezer, you could also keep them in the bowl with the marinated chicken if it is big enough. A third option would be to boil the bones to create 3/4 cup of stock which you then put in the fridge.
Tags: Carrots, Chicken, Japan, Mirin, Miso, Onion, Soya Milk
(serves 4)
In winter curry is a really nice hearty food that warms you up. This is a great basic Southern Indian curry recipe suitable for most palates and ideal for those cooking curry for the first time. It is mild in two ways. The grassy flavour of mutton is greatly reduced and so people who don’t like the taste of lamb may find it actually quite nice. It is also not very spicy, so those who don’t fancy spicy foods might still find it acceptable.
Ingredients
- Lamb Belly (500g)
- Potato (2 Large)
- Carrot (1)
- Onion (1)
- Shallots (4)
- Coconut Milk (1 Cup)
- Curry Powder
- Caraway Seeds
- Cumin
- Turmeric
- Vegetable Cube
Preparation
- Cut the lamb into one inch cubes. Trim off any obvious large layers of fat. It’s easiest to do this when the meat is semi-frozen, but warm to room temperature using water before proceeding with the next step.
- Place the lamb pieces in a pot and pour in boiling water from a kettle until the water level is a inch above the meat. Stir, wait 5 minutes, and pour the water away.
- Take the meat out of the pot and dry the pot over the stove.
- Peel and julienne 4 shallots. Using a low flame, pan fry the shallot slices in 4T of oil.

- When the shallot begins to brown add 4T Curry Powder and 2T Cumin to the pot and stir fry. Add water a bit at a time until you end up with a watery paste.
- Add 5 cups of water. When this comes to a boil, add the lamb belly pieces followed by 1t turmeric, 1t caraway seeds, 1 vegetable cube, 2t sugar and 2t salt.
- Cover the pot and keep it on a low simmer for 45 minutes.
- In the meanwhile, peel and cut the carrots into half inch thick discs and the onion into twelve wedges. Peel and cut each potato in 4. Dice one of the quarters into tiny cubes (you want them to disintegrate).
- After the 45 minutes is up, add the vegetables and 1 cup of coconut milk and simmer for a further 30 minutes. Boil uncovered and use this period to manage the thickness of curry to what you prefer.
- This curry can be prepared ahead of time and reheated for serving. Depending on the curry powder you may need to add more salt. Remember to taste before serving.
Notes
- Your curry is ideally served with rice, which you will also have to cook. A long grained rice is ideal, like Indian Basmati or Thai Jasmine rice. Any kind of sturdy bread, like Paratha, Naan, or even French Baguette would be an alternative staple.
- In case you are wondering what kind of curry powder to buy, you can refer to the contents of the curry powder I use pictured above. Once you examine what curry powder is made of, you’ll realize that the addition of 2T of cumin in the recipe serves to dilute the overall amount of chili, thus making the curry less spicy.
- The coconut milk also makes the curry less spicy, so if you want a more spicy curry, use only half a cup of coconut milk.
- If you are the type who wants the full flavour of lamb, skip step 2 whose purpose is to reduce the grassy overtones of the lamb. You can also use a lamb stock cube instead of a vegetable stock cube. As for myself, I usually use 1T of red miso in place of the vegetable cube. This really enhances the taste of the whole dish.
- This recipe can easily adapted to make chicken curry. Leave out the caraway seeds and use a chicken cube instead. Chicken doesn’t need to be cooked for that long so skip the entire 45 minute simmer and add the chicken pieces together with the vegetables in step 9.
- If you want a more northern taste to your curry, use plain yogurt in place of coconut milk and cherry tomatoes in place of the carrots.
Tags: Coconut, Cumin, Curry, Lamb, Onion, potato, Rice
(serves 2)
Miso-Cured Black Cod, also known as Gindara Saikyo Yaki, started out as a way to preserve fish in Japan, but has since become the default method of cooking Alaskan Black Cod. The curing process cuts through the fattiness of the black cod, and results in a decadent smokey and buttery flavour that makes Gindara appreciated by one and all, young and old. Of all the ways of preparing fish in Japan, this is perhaps the one that is most suited to Western palates.
 Ingredients
- Alaskan Black Cod (500g)
- White Miso
- Mirin
- Sake
- Minced Garlic
- Cooked White Rice
- Mayonnaise
- Salt
Preparation
- Make a solution using 2 cups of water with 1T of salt and 1t of sugar. Brine 500g of black cod in the solution for 20 minutes.
- After rinsing the cod, wrap each piece in some paper kitchen towel and squeeze gently over the sink. Wrap the fish with fresh pieces of kitchen towel to soak up any remaining water. Leave the fish to fully dry on a metal rack for half an hour or so.
- Mix 2 heaped T of white miso (40g) with 3T Mirin and 2T sake in a bowl until you arrive at a paste. Stir in 1t of minced garlic.
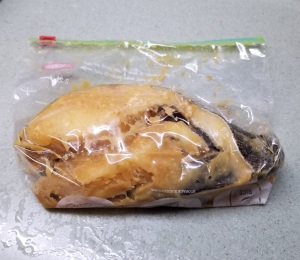
- Slather the marinade onto the fish and then place the fish into a zip lock bag. Seal the bag with minimal air and then proceed to move the fish pieces around inside the bag. This will ensure the miso mixture comes into contact with every surface of the fish.
- Cure the fish in the fridge, for 2 days if you desire a milder flavour, and up to a week for a more intense miso infusion.
- When you are ready to cook your black cod, allow the fish to warm to near ambient temperature.
- Use a few T of oil to wash the curing marinade off the fish. Miso chars easily, so you should be thorough.
- Arrange the fish on a baking tray with the skin side facing up and place the tray in a toaster oven preheated to 180oC (360oF) for twenty minutes.
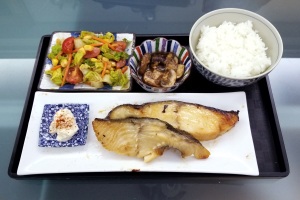
- Traditionally miso-cured black cod is served fish white steamed rice, a generous dollop of mayonnaise and a few slices of pickled ginger.
Notes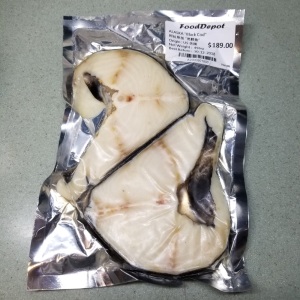
- Alaskan Black Cod is also called sablefish. It is technically not actually a member of the cod family, so do not substitute another type of cod. You can however cure other kinds of large oily fish with the same method. Swordfish for example would be a good alternative.
- Brining and removing the excess water are essential as they prevent a fishy odour from developing. You are after all leaving the fish raw for several days in the fridge. Other recipes typically get you to sprinkle salt over the fish, but I find brining to be more effective, and less salty.
- Oily fish take to freezing much better than white fish, so there is no need to use fresh fish, especially if you follow steps 1 & 2.
- If you are using steak cuts (as pictured) a good idea would be to roll the fish pieces onto their side for the final 5 minutes of baking, then plate with the bottom side up. This gives the fish a good finish.
- If you are using a full oven, you can reduce the cooking time to fifteen minutes as a large oven does not lose much heat compared to a toaster oven when you put the fish in.
- You must use only white miso. It is milder and sweeter. Outside of Japan it’s probably the last type of miso you would have around at home, so if you are tempted to try this with red or yellow miso, don’t. YIt won’t end well. Even if you do use white miso it will still tend to be a bit on the salty side, it is cured fish after all. You thus have to serve it with a very plain unsalted staple, like rice.
- Miso-cured Black Cod is also great for BBQs. Just wrap individual pieces in foil and broil them over the barbie.
Tags: Fish, Japan, Mirin, Miso, Sake
(serves 2)
Spaghetti Aglio e Olio is practically the most basic of the Italian pasta dishes, a pasta made from a few simple ingredients, something that anyone can cook to perfection. This version of Spaghetti Aglio e Olio is made a little less unremarkable with the addition of some seared scallops. Scallops are an ideal enhancement as they are have a mild and delicate taste which will not diminish the core taste of garlic and olive oil.
Ingredients 
- Scallops (Frozen, 250g)
- Spaghetti (200g)
- Garlic (2 bulbs)
- Parmigiano Reggiano (grated, 2T)
- Pesto
- Dried Chili Flakes
- Extra Virgin Olive Oil
- Light Olive Oil
- Salt
Preparation
- Defrost your scallops. Large Yesso Scallops would be preferred.
- Peel the two bulbs of garlic. Slice the cloves into very thin slices as shown. You
 should end up with a small mountain (as shown). Don’t worry, it’s looks like its a lot, but it isn’t.
- Brine the scallops in a solution of 1T salt, 1t sugar and one and a half cups of water for 15 minutes. After draining, leave the scallops in a colander to dry (as shown). Finish off the drying by wrapping the scallops in a few sheets of kitchen towel.
- Grate some parmigiano reggiano until you end up with 2T of grated cheese.
- Place the garlic in a pan. Add 6T of light olive oil and turn the heat to low. Stir occasionally until the garlic turns a light brown.
- In the meanwhile bring a pot of water to boil. Add a splash of oil and a pinch of salt followed by the pasta.
 Boil until al dente and drain (but keep some of the water).
- Using a strainer, remove the garlic but leave the oil in the pan.
- Turn the heat up and place the scallops in the pan. Cook for about 3 minutes on the first side and 2 minutes on the other. Confirm that they are seared before flipping, the actual time will depend on the size of your scallops.
- With the fire still going, push the scallops to one side of the pan and add 4T of extra virgin olive oil and 4T of the pasta water, followed by 1t of pesto, 1t of chilli flakes, 1t of salt and 2T of grated parmigiano reggiano. Stir and mix well to create the olio sauce.
- Turn off the heat. Add the garlic and then the pasta to the pan. Toss until everything is nicely mixed.
- Check if you need to add more salt, and then plate.
Notes
- In case you were wondering, Aglio means garlic, Olio means oil.
- Plain Spaghetti Aglio e Olio is exactly the same recipe but without the scallops. It’s a really fast and convenient dish to cook, you won’t even need to take the garlic out of the pan.
- If you are an experienced cook you can pan fry the garlic and scallops at the same time (as shown). Give the garlic a head start of about 2 minutes before adding the scallops. The garlic will not be as crispy this way (which I like) but it saves time and effort.
- Don’t use extra virgin olive oil for frying the garlic as it will carbonize under the extended heating. If you don’t have light olive oil, you can use any kind of frying oil, such as canola oil.
- Don’t brine the scallops for more than 15 minutes as they absorb salt really fast as compared to meat. Don’t skip the brining either, even if you are not using ‘wet’ scallops.
- The chili flakes are optional, but I really recommend you use them as depth is needed in this simple pasta sauce. You can double the amount to 2t if you are not averse to spicy foods.
Tags: Brine, Garlic, Olive Oil, Pasta, Pesto, Scallop
(serves 4-6)
As Chinese New Year nears, I’ve been cooking more Chinese dishes, such as this Spicy Eggplant Braised in Clay Pot. In the winter time, it’s hearty nature will help warm up the whole family. The Eggplant in Clay Pot is a relatively common Chinese dish, as popular in restaurants as it is in the home kitchen, so it’ll be a good dish to try if you are cooking Chinese for the first time. It’s not complicated at all. Although this recipe involves quite a few Chinese sauces, they are the common and inexpensive ones, easy to find in the Chinese section of any large supermarket or any Chinese food store.
Ingredients 
- Minced Pork (200g)
- Eggplant (1)
- Garlic (6 cloves)
- Scallion (4 sprigs)
- Anchovies in Oil
- Toban Sauce
- XO Sauce
- Soy Sauce
- Oyster Sauce
- Chinese Wine
- Sesame Oil
- Corn Starch
note: Claypot is part of the name of this dish in Chinese (鱼香茄子煲) but you can easily cook this in any deep or large frying pan, and a claypot is not actually required.
Preparation
- Marinate the minced pork in a mixture of 1t soy sauce, 1T Chinese wine, 1T sesame oil and 3T of water.
- Peel and mince 6 cloves of garlic. Juliene the scallion, keeping the white bits separate from the green bits.
- You’ll need the long type of eggplant for this recipe, as some skin is best left on every piece to prevent the flesh from disintegrating when it is cooked. After removing the top, divide the eggplant into 4 cylinders. Slice each cylinder like you would a pie, the ones with a larger diameter into 8 segments, and the smaller ones into 6.
- On high heat, stir fry the eggplant in a large claypot (or pan) with 4T of oil until they begin to soften. As eggplants really like to absorb oil, you may need to add more oil halfway. Tempor
 arily remove the eggplant from the claypot.
- Spoon 3t of anchovies in oil into the claypot. Add 2T of oil and under medium heat mash the little fishies until you get a paste. Add the minced garlic, the white bits of scallion and 2 heaped t of Toban sauce.
- Stir fry until everything is nicely combined, then add the pork and continue to stir fry until the minced pork falls apart and begins to shrink.
- Turn the heat down. Stir 1t of corn starch into 1/4 cup of water, making sure the starch is completely dissolved. Next, stir in 1T of Oyster Sauce and 1t of sugar into the water as well and then pour the starch mixture into the claypot.
- Stir occasionally to make sure nothing sticks to the bottom.
 After a while you should end up with something that looks like spaghetti bolognaise, as shown on the right. This is when you put the egg plant back into the claypot. Add 2 heaped t of XO sauce and simmer with the cover on until the egg plant is soft as shown in the top picture. This will take perhaps ten minutes.
- When the dish is done, turn off the heat and sprinkle the green bits of the scallion over the top as a condiment. Put the cover back on and serve everything in the claypot itself.
Notes
- You are not supposed to eat this Spicy Braised Eggplant by itself and it is traditionally served with steamed rice to balance out its strong taste, but if you are not into cooking rice, some egg noodles like fettuccine tossed in the sauce is a good alternative.
- Here is some background on this casserole: The dish has its origins in Szechuan Province as a common stir fry dish, hence the use of Toban Sauce as its base. However, when the dish finds its way south to Hong Kong, the chefs there adapt the recipe to local tastes by cooking it in a wetter style inside a clay pot and adding bits of Cantonese salted fish to enhance its flavour. While not obvious to others, this is a really crazy combination, like putting sauerkraut in risotto, but it works. And that’s the story of this the Spicy Eggplant Casserole.
- Cantonese salted fish is a rather exotic ingredient to expect of a Western kitchen, which is why I have substituted it with anchovies.
- Some people like to add some corn starch to the pork marinade as well, which makes the pork softer. Personally I prefer more bite to the minced pork, but the jury is still out on whether this is better.
- There is no need to soak the eggplant in salt water. It’s supposed to remove the bitter taste? But honestly I haven’t tasted a bitter eggplant in my entire life.
Tags: Anchovy, Chinese Cuisine, Chinese Wine, Egg Plant, Pork, Scallion, Toban Sauce
(serves 4)
The Hamburg Steak is the predecessor of the hamburger, before it was turned into a humble sandwich. That’s not to say the Hamburg Steak is simply a hamburger without a bun, for it has many more ingredients, for instance a gravy. In this sense you can think of the Hamburg Steak as a cross between a Salisbury Steak and Bangers & Mash. The city that the most people eat Hamburg steak is not Hamburg as you might expect, but Tokyo; in Japan every family restaurant will serve Hanbagu Steakey and it is cooked at home by every family. My recipe is based this delicious Japanese version of the Hamburg Steak.
Ingredients 
- Minced Beef (500g)
- Egg (1)
- Shallots (5)
- Milk (0.5 cup)
- Bread (2 slices)
- Onion (1)
- Oxo Beef cube (1)
- Mustard
- Worcestershire Sauce
- Miso
- Sherry
- Soya Sauce
- Butter
Preparation
- Leave 2 slices of bread exposed in the fridge overnight to dry out.
- Toast the bread on very low heat for 15 minutes to make them ultra crispy and then smash the bread with a mallet into crumbs (in a plastic bag).
- Peel and cut 5 shallots in half and julienne them into very thin slices. Peel and cut one onion in half and slice it into thick half rings. If the outmost layer of the onion is thin, you should discard it as it will get burnt before the rest of the onion softens.

- Pan fry the shallot slices in 3T of oil on a low flame until you notice a few pieces have turned brown (see picture). Turn off the heat and allow to cool (the shallots will darken further). After some time spoon the shallots and oil into a mixing bowl.
- Add one egg, 1/2 a cup of milk, 1T Worcestershire sauce, 1t soya sauce, 1t mustard, 1t salt to the mixing bowl and mix well. Stir in the bread crumbs. Next, add the ground beef followed by a sprinkle of 1t white pepper and fold until you get a homogenous mixture. Leave the beef to stand. Do not be concerned if there are any pieces of bread crumb visible.
- In the same pan, sauté the onion slices on low heat in 3T of oil until the onion begins to darken.
- Dissolve 1 Oxo beef cube and 1t of miso in 1 cup of boiling water. Add the stock to the pan with the onions. Follow up with 1T sherry, 1t sugar, 1t mustard and simmer until most of the water has boiled off and you are left with an onion gravy. Pour the onion gravy into a gravy boat or other vessel.
- Separate the ground beef into 4 equal parts with the end of a fork or spoon. Shape each portion into a ball in your hands, which you then flatten into a thick (1 – 1.5 inch) patty.
- Add oil to the pan (which you have cleaned) and heat up the pan. When the oil is sizzling hot, place the beef patties into the pan.
- Pan fry the beef patties for 6 minutes flipping them every minute or so. After the 6 minutes add 1/3 cup of water and cover – allow the beef to steam for a minute.
- Remove the cover and add a large knob of butter. Flip the hamburgs one last time. Turn up the heat. When most of the water has boiled off, plate the hamburgs and pour the pan’s residual liquid into the onion gravy. Spoon the gravy over the beef patties to complete your hamburg steak.
Notes 
- The staple typically served with Hamburg Steak is steamed white rice or mashed potatoes, rarely fries and never bread.
- Like other steaks, there will usually also be an assortment of cooked vegetables like carrots, egg plant, tomatoes or string beans. Many of these can be cooked together with the beef in the pan so plan accordingly. A sunny side up fried egg is also typical.
- If you don’t like the idea of an onion gravy, Hamburg Steak is also be served with a variety of other sauces, like black pepper sauce, mushroom sauce or demi-glace sauce.
- For the ‘cheeseburger’ version of the Hamburg, you don’t place a slice of cheese on the meat, but insert a block of cheese in the middle of the raw burger.
- The Hamburg Steak is supposed to be eaten well done, so don’t try to make them ‘medium’. In Japan they sometimes mix some minced pork with the beef and you definitely want to eat pork fully cooked. Even fully cooked the meat will remain tender and juicy because of the non-meat ingredients and the steaming, so there is no need to worry about your ‘burger’ becoming tough and hard unless you really overcook it a lot.
- Do not substitute onion bits for the shallots. It won’t impart the right flavour to the beef.
Tags: Beef, Butter, German Cuisine, Japanese Cuisine, Onion, Shallots, Steak
(serves 6)
Chicken Kiev is the king of chicken breast dishes, the perfect fool proof way of preventing a chicken breast from getting dry. The breast meat is kept moist and juicy because it is stuffed with butter. And when the breast is cut open, the butter serves as a sauce for the dish. No one knows for sure where Chicken Kiev comes from except that it’s not from Kiev. The Russian restaurants seemed to have claimed ownership of this dish while others insist that it was originally a French dish called Cotelettes de Volaille. No matter, it tastes just as good.
Ingredients 
- Big Chicken Breasts (6 halves)
- Butter (140g)
- Shallots (4)
- Bread (4 slices)
- Garlic (3t minced)
- Flour
- Eggs (2)
- Basil
- Mint Leaves
- Salt
- Brown Sugar
- Toothpicks
Preparation
- Begin by brining your chicken breasts overnight, for about 10 hours, in a solution of 3T Salt, 1T Brown Sugar and 4 cups of water. For details you can refer to this post.
- Place 4 slices of bread exposed in the fridge overnight to dry out.
- When the 10 hours are up, give the chicken breasts a quick rinse to end the brining process and keep them in the fridge until needed.
- Finely chop 4 shallots. Pan fry the shallot bits in 2T of oil on a low flame until you notice a few pieces have turned brown. Turn off the heat and allow to cool. In the meanwhile mince a few garlic cloves until you get 3 semi-heaped teaspoons of garlic.
- Put 140g of butter, that’s about two thirds of a block, in a bowl and cut the butter roughly into cubes. A pair of scissors is the best implement for this. Allow the butter to warm until it is
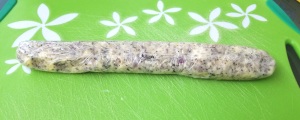 soft, then fold in the minced garlic, shallots, 1T chopped mint and 1T of chopped basil. The butter should stay opaque and not be allowed to melt at any time. Spoon the herb butter onto a large sheet of cling film and roll it into a long rod. Keep the butter sausage in the fridge until it is needed.
- Toast the bread under very low heat so it doesn’t brown, until it is dry and crisp. Place the bread into a plastic bag and smash it into crumbs using a mallet.
- The next step is to cut a cavity into each
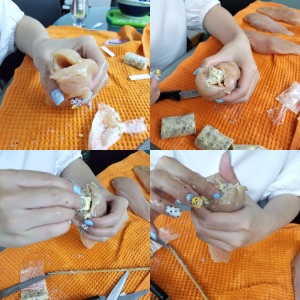 breast. Start by drying the chicken with a tea towel. Plunge a pointed knife about two thirds of the way into a breast from the bigger end. Carefully scrape the tip of the knife along one side of the cavity a few times in a circular motion to enlarge it. Flip the knife over and do the same to the other side of the cavity. While you are doing this, take extra care at all times not to let the knife pierce out through the surface. At the same time you should do your best not to enlarge the opening.
- Cut the butter sausage into six cylinders. Do this while it is still in the cling film. Unwrap one cylinder of butter, halve it lengthwise and push both pieces into the cavity one after another, as far as they’ll go. Repeat the same procedure for the remaining breasts.
- Beat two eggs. Cut a one inch piece off the tip off each chicken breast. Dip these trimmings in the egg and after folding or rolling each piece, use them to plug up the openings. Secure each plug with a wooden toothpick. If you inadvertently punctured any of the breasts earlier, you can attempt to ‘repair’ the damage with toothpicks as well.
- Coat each breast in flour, taking care to cover every part of the breast, especially the area around the plug.
- Heat up a frying pan with some oil. Roll a breast in egg and then the breadcrumbs until it is nicely coated.
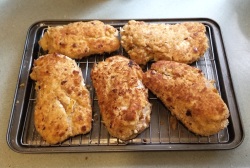 Put the breast straight into frying pan. Pan fry for about a minute, making sure the entire surface is cooked. A pair of kitchen tongs will be helpful in achieving this. Control the fire to make sure the bread doesn’t get burnt. Leave the breast to rest on a wire tray inside a baking tray. Do the same for the remaining breasts, adding more oil to the pan for each new breast.
- Preheat your oven to 175oC (350oF). Place the tray of chicken into the hot over for 20 minutes, or until you notice the chicken begin to shrink.
- It’s best to serve the Chicken Kiev straight out of the oven. Sprinkle lightly with white pepper while the chicken is still on the baking tray. Remember to remove the toothpicks after plating.
Notes 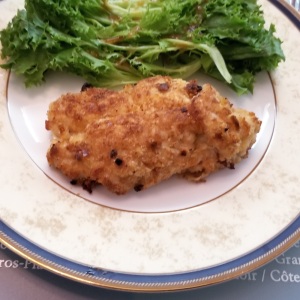
- Purists will no doubt point out that the proper way to make Chicken Kiev would be to pulverize a butterflied chicken breast into a very thin schnitzel which is then rolled around a slab of butter. This method has its merits but is quite labour intensive. Should you ever choose to try it, you should season the chicken instead of brining it.
- Chicken breasts can be plump and roundish or elongated and you should buy the former. I find those from Denmark and Holland are very suitable for stuffing. If the breast is of the elongated type, it will be too flat, making the carving a proper cavity for the butter doubly difficult.
- Don’t expect a large amount of melted butter to gush out when you cut the chicken as some of the butter will be infused into the surrounding meat. If you desire more flowing butter, you can increase the amount of butter to a full block. But in order to do this the cavity has to large; maybe you can wait until you have had some practice at cutting cavities into chicken breast before attempting to use more butter.
- There is no ‘standard’ herb to use for the butter. You can substitute other herbs of your liking, or even add things like sautéed mushrooms to the butter. I even used a bacon onion dip once instead of butter and it tasted great.
- If you have a large number of diners, it may be easier to just deep fry your Chicken Kiev in one go instead.
Tags: Butter, Chicken, French Cuisine, Garlic, Herbs, Russian Cuisine, Shallots
(serves 2)
Linguine Vongole is one of the pasta classics and it can be prepared in a short amount of time, without too much of a fuss. It is the pasta that should be part of the repertoire of every home cook. Linguine Vongole’s flavours may be simple and its ingredients are few, but it remains a favourite of one and all, which speaks volumes about what a perfect combination clams, garlic, oil and white wine make. If you are just picking up cooking, this is the perfect dish for you to try your hand at.
Ingredients
- Baby Neck Clams in Shell (2 dozen)
- Linguine (200g) or Spaghetti
- Garlic (1 bulb = 12 cloves)
- Onion (1/2)
- White Wine (1/3 cup)
- Olive Oil
- Italian Parsley
- Basil
- Coriander Seed Powder
Preparation
- Soak your clams in water ahead of time. If you are using frozen clams like I often do, rinse the clams briefly under running water before soaking.
- Slice the cloves of garlic into thin slices. Cut the half onion into thin half rings. (peel them both first of course)
- Decant the clam water into a pot top up as necessary. Add a dash of olive oil and 1/2 t of salt. Bring to a boil and put the pasta into the pot.
- In a pan heat up a few T of olive oil with the garlic slices. Stir fry until the garlic begins to darken, then add the onion. Continue to stir fry.
- When the onion breaks into individual half rings from the hear, add the clams.
- Stir fry for a about minute and then add 1/3 cup of white wine followed by 1t of coriander seed powder. Cover the pan and bring to a boil, then turn off the heat immediately.
- When the pasta is no longer stiff but not quite cooked yet, transfer it to the pan.
- Stir 1.5t of salt and 0.5t of sugar into 1/5 cup of olive oil. Pour the oil over the pasta in the pan. Sprinkle on 1T chopped basil and 1T chopped parsley.
- Turn on the heat and toss the pasta in the sauce until it is cooked to the desired hardness.
- Plate and garnish with a bit more chopped parsley and some black pepper.
Notes 
- The right number of clams will of course depend on the size of the clams. The clams I used are quite large. You should use more than two dozen clams if you use smaller clams. As a rule of thumb, the weight of the clams for this recipe (with shell) should be around 500g.
- If you prefer the soupy type vongole sauce, add 4T of the pasta water right before the final toss.
- You will notice I did not specify extra-virgin olive oil. I don’t think that a strong olive oil taste goes well with ‘fresh’ clams. If you don’t have light cooking olive oil, any kind of mild vegetable oil will do.
- The type of white wine matters too. I use chardonnay because I don’t want my sauce to be too sour. Some people like it a bit tart in which case sauvignon blanc would be the wine to use.
- If you plan to use canned clams, consider my Linguine with Clams and Pesto Recipe instead.
- You may have noticed a few slices of scallops in the picture. That’s just a little bonus I added for myself and not part of the official recipe.
Tags: Basil, Clams, Garlic, Linguine, Olive Oil, Onion, Parsley, Vongole
(serves 4, or more depending on size of bird)
Spatchcock is a fancy word for butterflying the whole chicken. It sounds hard, but its quite the opposite. There are many advantages to spatchcocking. First and foremost a flattened chicken roasts more evenly, resolving a major issue with roasting chickens for those without a rotisserie; the thighs take longer to cook than the breast, but ironically when you roast a whole bird it is the breast that is more exposed to heat. Spatchcocking exposes the legs more and brings the breast down, saving the day. In addition, a spatchcocked chicken cooks in half the time and is in a more convenient shape for fitting on a fridge shelf.
Ingredients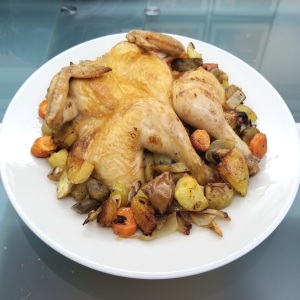
- Chicken, whole (1)
- Onion (1)
- Potatoes (2)
- Yam (1)
- Carrot (1)
- Salt
- Brown Sugar
- Butter
- Rosemary
- Fennel Seeds
Preparation Part I
- You have to begin preparation the night before.
- Starting on either side of the bishop’s nose, cut towards the corresponding side of the chicken’s neck (as per the picture below). This is best accomplished using a pair of kitchen shears. You will need to cut through the ribs, but not to worry, these are pretty flimsy in a chicken.
- From the inside of the chicken, snip an incision along the cartilage of the breast bone (it is white) top to bottom to weaken it. Be careful not to pierce the skin on the other side.
- Flip the bird over and press down on the breast with both hands to flatten it. You should end up with the iconic cartoon heart shape chicken breast.
- Prepare a brining solution using 1T salt, 1t brown sugar for every two cups of water. Make enough brine to ensure the entire chicken is submerged. Brine the chicken for 8 hours. If the weather is warm, either add a some ice every once in a while or leave the brining bird in the fridge.
Preparation Part II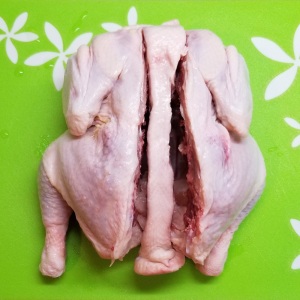
- When the brining is done (presumably the next day), place the bird on a wire tray to dry (as shown below). This will take several hours and again is best done in the fridge. Alternatively you can use a portable fan.
- You must dry the bird properly for it is the key prerequisite to a properly roasted chicken. The chicken is considered sufficiently dry when you put a piece of kitchen towel on it and the paper remains dry but sticks to the skin like a second skin.
- In a small pan, heat 1 heaped t of dried rosemary, 1 heaped t of fennel seeds in 4T of oil until you can smell a strong aroma. Turn off the heat before the herbs get burnt. Leave the pan on the stove while the chicken is drying; more herb flavour will be infused into the oil.
Preparation Part III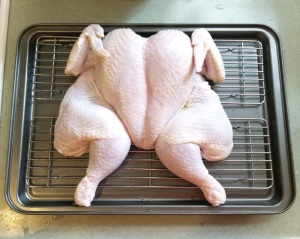
- Cut the potatoes and the yam into chunks. Depending on the variety you may want to peel them first. The yams should be double the size of the potatoes as they cook faster.
- Cut the carrot into discs and the onion into small wedges. Place all the vegetables on a baking tray.
- Preheat the oven to 205oC (400oF).
- Reheat the infused oil. When the oil becomes less viscous, strain the oil into a container. Add a large knob of butter to the oil. Next dissolve half a t of salt in the butter-oil mixture. Drizzle half of this mixture over the vegetables using a spoon.
- Position the chicken over the vegetables on the tray. Make sure all the vegetables end up under the chicken as any piece left exposed will become burnt beyond recognition.
- Paint the remainder of the oil-butter mixture on the chicken with a brush.
- Place the chicken in the oven for 45 minutes, 50 minutes if it is a bigger bird.
- When the chicken is golden brown, remove the pan from the oven without turning it off. Place the chicken on a large serving plate to rest after giving it a light dusting of pepper.
- Roll the vegetables about in the tray to cover them with drippings, space them evenly and place the tray back in the oven for around 10 minutes. When the vegetables have caramelized sufficiently, arrange them around the chicken on the plate. Pour any remaining drippings over the chicken and serve.
Notes
- As you can see from the pictures, the legs were open at an angle while drying but became parallel to each other after cooking as the meat contracted. Purists will secure the chicken with 2 long metal skewers in an X pattern, from the left thigh through to the right breast and vice versa to keep the chicken completely flat. This also helps all the skin brown more evenly. I think its a bit of an overkill, but skewers are definitely a good idea when BBQing.
- My brining mixture is a relatively weak one as we are brining the whole chicken and not just the breast. If you like your roast chicken on the salty side, you can double the salt in the butter-oil mixture to a full teaspoon.
- The back and spine that is cut out is good for boiling stock. If you don’t need it concurrently, you can wrap it in cling film and freeze if for later.
Tags: Brine, Butter, Carrots, Chicken, Onion, potato, Rosemary


