(serves 5-6)
This is essentially a deconstructed Lobster Thermidor served chilled, containing all the key ingredients of the hot version – lobster, wine, mushrooms, onions, cream and cheese. Morel mushrooms make up for the flavour that comes from the grill while the whipped cream and Parmesan provide the structure to hold the dish together. It makes for a great lobster appetizer that is neither greasy nor filling like the original.
Ingredients
- Lobster Tails (500g)
- Dried Morel Mushrooms (1 cup)
- Grated Parmigiano Reggiano (1/3 cup)
- Onion (1)
- Whipping Cream (300 ml)
- White Wine (1/3 cup)
- Butter
- Paprika
- White Pepper
- Tarragon
- Chopped Parsley
Preparation
- Defrost and remove the shell of the lobsters. Brine the meat in a solution of 1T salt and 1t sugar in 2 cups of water for 20 minutes.
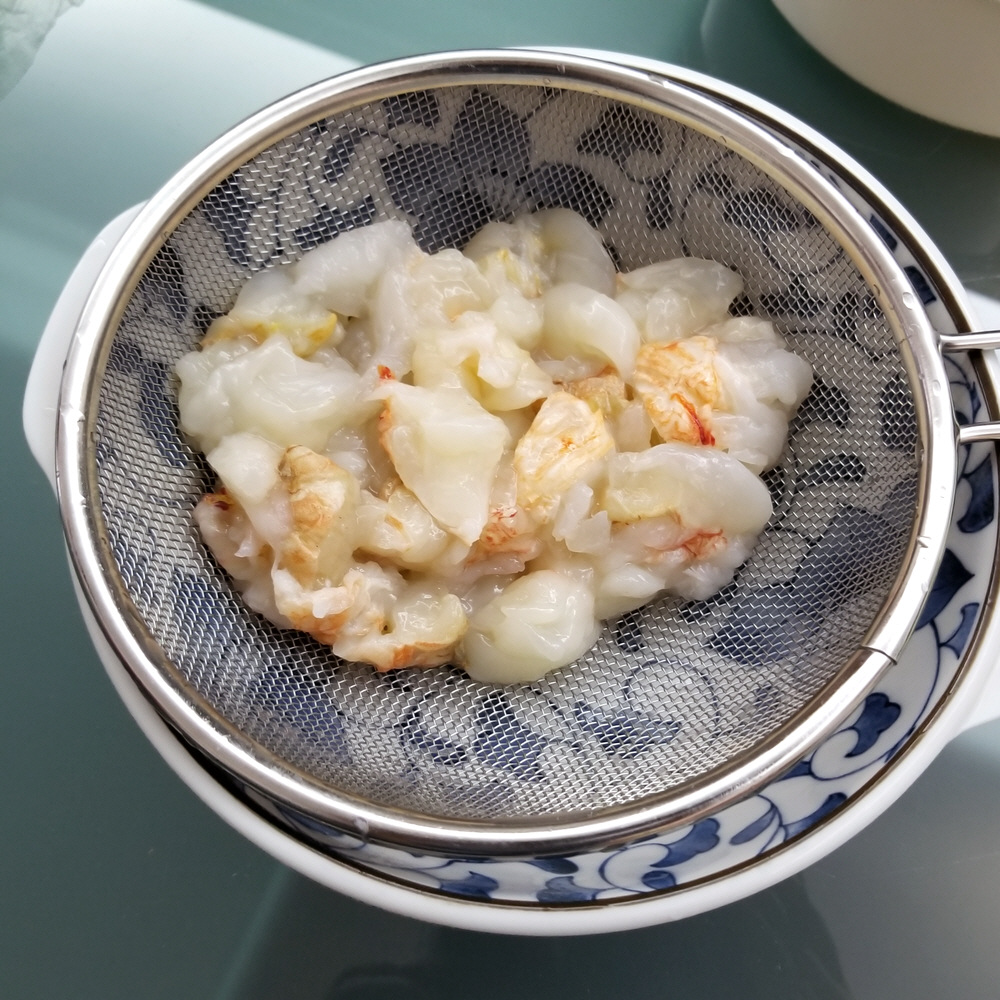 Cut the lobster meat into bite sized morsels. drain off all the excess brine by leaving the lobster meat in a strainer.
- Soak 1 cup of dried morel mushrooms in 1 cup of water, until the mushrooms are soft. Squeeze the morels like a sponge to remove excess liquid, but keep all the soaking liquid for later use.
- Finely grate 1/3 cup of Parmigiano Reggiano.
- Dice one onion into 1/4 inch pieces.
- Add a large knob of butter to large pan, and pan fry the onions on low heat until they begin to soften.
- Add a second large knob of butter and the morels. Stir fry for a further minute.
- Turn up the heat and add the lobster followed by a light sprinkle of white pepper. Stir fry until the the lobster is no longer translucent, then add 1/3 cup of white wine together with 1t of chopped tarragon. Bring back to simmer and turn off the heat.
- Pour the contents of the pan into a strainer with a bowl below to catch the excess liquid.

- Return the liquid to the pan. Add the morel water, 1t sugar and bring to a boil. Then sprinkle on the grated parmesan and stir until all the sheese has melted. Simmer the liquid down to half a cup. Pour the liquid into a cup.
- Pour the cheese wine mixture into a cup and and allow to cool to room temperature. The lobster and mushrooms need to be cold, so place them into the fridge in a ziploc bag.
- Pour 300 ml of cream into a container and whip until it forms stiff peaks. Then pour in the (room temperature) cheese wine liquid, add 1 flat t of paprika and fold until they combine completely. If you are using a hand held blender, you can use a three second pulse on low speed.
- Pack the (cold) lobster and mushrooms snugly into wine glasses (or some other serving container) and top off with the mousse. Garnish each serving with a pinch of finely chopped parsley.
- Cover the mouth of each glass with cling film and leave in the fridge to chill until it is time to serve.
Notes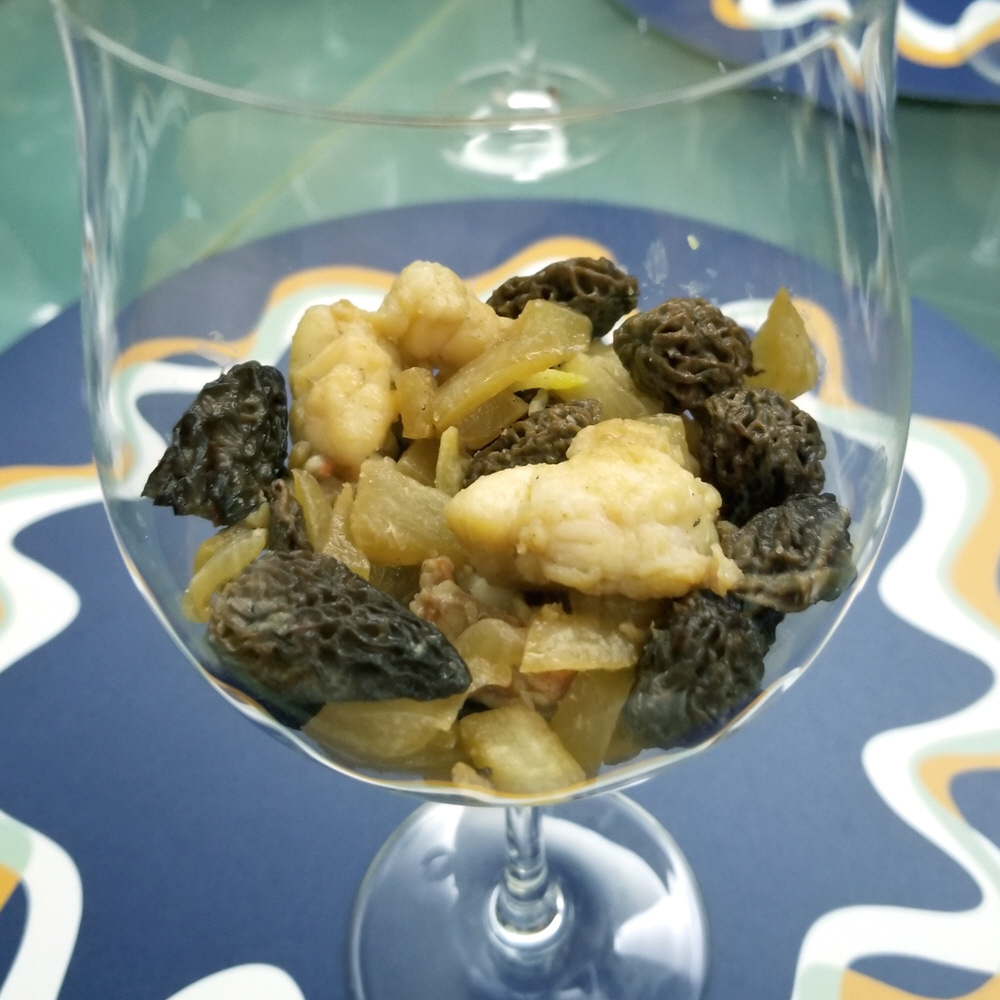
- Most recipes use gelatin powder as the solidifying agent for savoury mousse but parmesan cheese brings with it an additional level of umami flavour and tastes more natural.
- There’s no point in using the more expensive large lobster tails. FOr 500g, 4 small lobster tails will do the job nicely.
- If you are pressed for time, you can put the ziploc with the cooked lobster in the freezer for 15 minutes. For the liquid, you can put the cup in an ice bath.
- The best way to put the mousse into wine glasses is to push the mousse off a table spoon using a tea spoon. Let the mousse drop dead center into the glass without touching the sides of the glass. You can flatten the mousse using a tea spoon as you rotate the glass.
- If you don’t have any morel mushrooms, you can substitute with another kind of dried mushroom (like Porcini). Don’t use fresh mushrooms.
- Remember to wash the strainer before you reuse it in step 8 as it has previously held raw lobster meat.
Tags: Cream, lobster, Morel, Mousse, Parmigiano-Reggiano, Wine
(makes 12)
Korokke, the Japanese version of the croquette, are big in Japan. Unlike the original French version they contain meat and vegetables and come in all kinds of flavours. The other special thing about Japanese Korokke is they are rarely used as side dishes and are typically eaten as a street food type snack, or even as a meal. Beef curry is probably one of the more unique flavours and well worth trying.
Ingredients 
- Minced Beef (200g)
- Sweet Potatoes (500g)
- Onion (1)
- Cream Cheese (125g)
- Eggs (3)
- Bread (3 slices)
- Curry Powder
- Corn Starch
- Worcestershire Sauce
- Mirin
- Nutmeg
- Paprika
Preparation 
- Leave three slices of bread without any wrapping in the fridge overnight.
- Boil 500g of sweet potatoes for 25 minutes. Use just enough water to cover the sweet potatoes and reserve the flavoured water after boiling.
- Drain away the water into a container for later use and allow the sweet potatoes to cool in the pot. Then peel, dice and finally mash the sweet potatoes with a fork. There is no need to completely pulverize the sweet potato, you want a bit of texture.
- Pour 1/4 cup of the reserved water into a bowl. Stir in 2T curry powder, 1T mirin, 1t worcestershire sauce, 1t nutmeg, 1t salt. Marinate 200g of minced beef in the mixture for 15 minutes.

- Peel and dice one onion into 1cm sized pieces. In a few T of oil, pan fry the onion bits until they are limp, but before they brown too much. Add the beef and stir fry until the beef is cooked.
- With the fire still going, make a hole in the middle of the pan and add 125g (about 4T) of cream cheese. Spoon in a few T of the reserved water and move a spatula over the cream cheese in a circular motion until it has liquified (see picture).
- Add the mashed sweet potato and mix everything together well. Turn off the heat and allow to cool. Keep the ‘filling’ in the fridge for a minimum of several hours.
- Cut the dried bread into croutons and desiccate further in a toaster oven at 120oC for 15 minutes. If you don’t have a toaster oven, toast before dicing the bread.
- Place the croutons on a piece of foil
 and methodically crush with the jagged face of a meat mallet. There is no need to hammer; simply press down firmly on the smooth face of the mallet head (see picture). Again, there is no need to completely pulverize the bread, you want some variety in crumb size.
- Prepare three shallow dishes, one with the bread crumbs, one with 1/4 cup of corn starch and in the third one beat 3 eggs with 1/2t of salt.
- Warm up oil in a pot for deep frying. The temperature is right when a bread crumb thrown in creates bubbles.
- Spoon an amount of filling equal in size to an XL egg into your hand. Shape this into a log. Roll the log first in the cornstarch to get a thick coating of starch, then quickly in the egg. Finally roll the log in the bread crumbs. Immediately deep fry. Repeat until all the mashed sweet potato is used up. As the insides are already cooked, you can adjust the heat as you like to produce a nice deep orange finish for your Korokke.
- Roll the croquettes while cooking occasionally to ensure even cooking. When a croquette is done, place it on a bed of paper towels to absorb excess oil.
- Serve your croquettes with a mayonnaise flavoured with paprika.
Notes
- If you leave your bread to dry in the fridge for several days, you can skip the toasting part and crush right after cutting into croutons.
- Cumin is not curry powder, it is not even the biggest component of curry powder. If you wish to mix your own, you can use the labelling on this package curry powder as a guide to the proportions of each ingredient.
- When coating the croquettes you can cover the ends by pushing the material up against the top and bottom of the log. This will reduce the handling of the croquettes and help them keep their shape.
- Yes I used sweet potato instead of potato. It is not uncommon to use something other than potato for Korokke in Japan, for instance yam, pumpkin or taro.
- If you want your Korokke to look exactly like the real McCoy you have to buy something called Panko Crumbs instead of crushing your own breadcrumbs. They are leafy crumbs which allows them to be bigger than regular crumbs.
- Steps 12-13 are best done by a two person team.
- The croquettes will continue to brown a bit after you remove them from the oil, so don’t over brown them.
- If want to make the shape perfect, you can roll your filling in cling film into (4?) long sausages. Place the sausages in the freezer for 15 minutes to harden them further before frying, but don’t completely freeze them solid. If you want it fast and easy, you can also make your croquettes in the shape of mini hamburgers.
Tags: Beef, Curry, Japan, Onion, Sweet Potato
(serves 4-5)
I just made this duck salad on Christmas eve and it is one of my favourite appetizers for the festive season; it’s got just the right amount of red, and green. Duck breast is surprisingly easy to prepare once you know the essential steps, perhaps easier than chicken breast even. Another thing I like about this recipe is the use of cranberry. We are used to having orange or red wine as the primary flavour that goes with duck and cranberry makes for a refreshing change. It is also a great ingredient for a salad dressing.
Ingredients 
- Duck Breasts (2, frozen)
- Baby Spinach (150g)
- Leek (1 cup, chopped)
- Cranberry Sauce
- Marmalade
- Mustard
- Balsamic Vinegar
- Liquid Smoke
- Salt
- Brown Sugar (soft)
- Brown Mushrooms (10)
- Cherry Tomatoes (10)
Preparation
- Defrost the duck breasts and brine in a solution of of 4 cups of water, 3T salt, 1T muscovado sugar for about 4 hours.
- After rinsing the duck breasts, Rub them with 2t of liquid smoke.
- Julienne the white portion of a stalk of leek until you have 1 cup.
- Using a sharp knife, scour the duck skin as shown. Do not cut all the way through the fat; if you can see the meat below, it’s too deep. Also, you should space the cuts in accordance with how you intend to slice the duck later. Here I’ve made my cuts two slices
 apart.
- Heat up a pan with a dash of oil and on low heat pan fry the duck breasts for 2 minutes. Only pan fry with the skin side down and move the breasts occasionally to make sure they don’t stick to the pan. The purpose here is to render as much duck fat as you can from the skin.
- Place the breasts on a lightly oiled baking pan with the skin facing up. Place the pan in an oven preheated to 175oC (350oF), for 12 minutes. I prefer to use the toaster oven which takes a bit longer, 15 min. If the breasts begin to shrink, this means they are done.
- Allow the meat to rest on the pan outside the oven.
- Saute the leeks in the duck fat in the pan until they become limp.
- Add 5 heaped t of cranberry sauce (ocean spray), 1 heaped t of marmalade, 1T balsamic vinegar, 2t mustard, 1 flat t of salt and 1/4 cup of water to the pan. Stir fry until the mixture comes to a boil. Then transfer it to a bowl. Pour the drippings from the pan into the bowl and mix well.
- Cut the duck breasts into slices, making sure some cuts are coincident with the cuts in the skin. The meat should be pink or you’ve over cooked the duck.
- Slice the mushrooms and cut each cherry tomato into 2. Arrange the baby spinach, tomatoes and mushroom slices into a bed on each plate.
- Arrange the duck slices on the salad and drench with the cranberry and leek sauce. Sprinkle with black pepper.
Notes
- Frozen duck breasts sometimes are already brined. Please check and if they are already brined, you can skip the relevant part. The same goes for the smoked.
- The choice of salad components was made with Christmas colours in mind. You can really make the salad with whatever you like. A white plate would really complete the festive look.
- I’ve found the safest way to score the skin properly is to use a sawing motion with a knife with small teeth, applying no downward pressure.
- You can precook the duck breasts and leave them around for a few hours, but only slice the meat and and plate the salad at the last moment.
Tags: balsamic vinegar, Cranberry, Duck, French Cuisine, Leek, Mushroom, Mustard, Salad, spinach, tomatoes
(serves 6)
Chicken Kiev is the king of chicken breast dishes, the perfect fool proof way of preventing a chicken breast from getting dry. The breast meat is kept moist and juicy because it is stuffed with butter. And when the breast is cut open, the butter serves as a sauce for the dish. No one knows for sure where Chicken Kiev comes from except that it’s not from Kiev. The Russian restaurants seemed to have claimed ownership of this dish while others insist that it was originally a French dish called Cotelettes de Volaille. No matter, it tastes just as good.
Ingredients 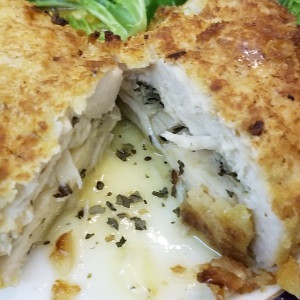
- Big Chicken Breasts (6 halves)
- Butter (140g)
- Shallots (4)
- Bread (4 slices)
- Garlic (3t minced)
- Flour
- Eggs (2)
- Basil
- Mint Leaves
- Salt
- Brown Sugar
- Toothpicks
Preparation
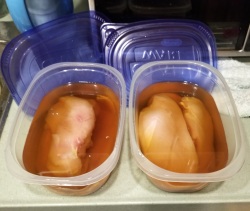
- Begin by brining your chicken breasts overnight, for about 10 hours, in a solution of 3T Salt, 1T Brown Sugar and 4 cups of water. For details you can refer to this post.
- Place 4 slices of bread exposed in the fridge overnight to dry out.
- When the 10 hours are up, give the chicken breasts a quick rinse to end the brining process and keep them in the fridge until needed.
- Finely chop 4 shallots. Pan fry the shallot bits in 2T of oil on a low flame until you notice a few pieces have turned brown. Turn off the heat and allow to cool. In the meanwhile mince a few garlic cloves until you get 3 semi-heaped teaspoons of garlic.
- Put 140g of butter, that’s about two thirds of a block, in a bowl and cut the butter roughly into cubes. A pair of scissors is the best implement for this. Allow the butter to warm until it is
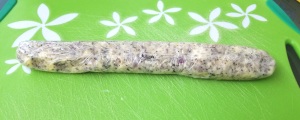 soft, then fold in the minced garlic, shallots, 1T chopped mint and 1T of chopped basil. The butter should stay opaque and not be allowed to melt at any time. Spoon the herb butter onto a large sheet of cling film and roll it into a long rod. Keep the butter sausage in the fridge until it is needed.
- Toast the bread under very low heat so it doesn’t brown, until it is dry and crisp. Place the bread into a plastic bag and smash it into crumbs using a mallet.
- The next step is to cut a cavity into each
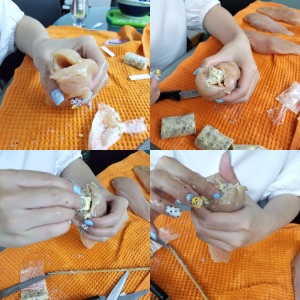 breast. Start by drying the chicken with a tea towel. Plunge a pointed knife about two thirds of the way into a breast from the bigger end. Carefully scrape the tip of the knife along one side of the cavity a few times in a circular motion to enlarge it. Flip the knife over and do the same to the other side of the cavity. While you are doing this, take extra care at all times not to let the knife pierce out through the surface. At the same time you should do your best not to enlarge the opening.
- Cut the butter sausage into six cylinders. Do this while it is still in the cling film. Unwrap one cylinder of butter, halve it lengthwise and push both pieces into the cavity one after another, as far as they’ll go. Repeat the same procedure for the remaining breasts.
- Beat two eggs. Cut a one inch piece off the tip off each chicken breast. Dip these trimmings in the egg and after folding or rolling each piece, use them to plug up the openings. Secure each plug with a wooden toothpick. If you inadvertently punctured any of the breasts earlier, you can attempt to ‘repair’ the damage with toothpicks as well.
- Coat each breast in flour, taking care to cover every part of the breast, especially the area around the plug.
- Heat up a frying pan with some oil. Roll a breast in egg and then the breadcrumbs until it is nicely coated.
 Put the breast straight into frying pan. Pan fry for about a minute, making sure the entire surface is cooked. A pair of kitchen tongs will be helpful in achieving this. Control the fire to make sure the bread doesn’t get burnt. Leave the breast to rest on a wire tray inside a baking tray. Do the same for the remaining breasts, adding more oil to the pan for each new breast.
- Preheat your oven to 175oC (350oF). Place the tray of chicken into the hot over for 20 minutes, or until you notice the chicken begin to shrink.
- It’s best to serve the Chicken Kiev straight out of the oven. Sprinkle lightly with white pepper while the chicken is still on the baking tray. Remember to remove the toothpicks after plating.
Notes 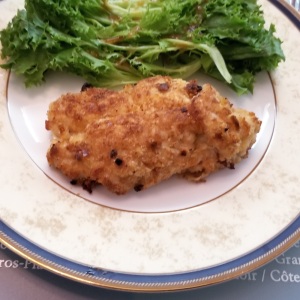
- Purists will no doubt point out that the proper way to make Chicken Kiev would be to pulverize a butterflied chicken breast into a very thin schnitzel which is then rolled around a slab of butter. This method has its merits but is quite labour intensive. Should you ever choose to try it, you should season the chicken instead of brining it.
- Chicken breasts can be plump and roundish or elongated and you should buy the former. I find those from Denmark and Holland are very suitable for stuffing. If the breast is of the elongated type, it will be too flat, making the carving a proper cavity for the butter doubly difficult.
- Don’t expect a large amount of melted butter to gush out when you cut the chicken as some of the butter will be infused into the surrounding meat. If you desire more flowing butter, you can increase the amount of butter to a full block. But in order to do this the cavity has to large; maybe you can wait until you have had some practice at cutting cavities into chicken breast before attempting to use more butter.
- There is no ‘standard’ herb to use for the butter. You can substitute other herbs of your liking, or even add things like sautéed mushrooms to the butter. I even used a bacon onion dip once instead of butter and it tasted great.
- If you have a large number of diners, it may be easier to just deep fry your Chicken Kiev in one go instead.
Tags: Butter, Chicken, French Cuisine, Garlic, Herbs, Russian Cuisine, Shallots
(serves 8)
Gratin Dauphinois, or as the French call it Gratin de Pommes à la dauphinoise, is the fine dining version of scalloped potatoes. It is a dish of layers upon layers of thinly sliced potatoes bathed in creamy savoury goodness. Perhaps Gratin Dauphinois is the crème de la crème of potatoes precisely because of the amount of cream and milk it incorporates. This explains why it beats all other potato dishes hands down even though there is nothing special about it ingredients, and its method of preparation is unremarkable. It goes without saying Gratin Dauphinois is something every decent cook should have in his repertoire.
Ingredients
- Waxy Potatoes (750g)
- Cream (200ml)
- Milk (200ml)
- Garlic (2t minced)
- Shallots (2)
- Parmigiano-Reggiano (40g)
- Butter
- Sherry
- Cumin
- Tarragon
Preparation
- Slice the potatoes. Each slice should be about 1/8 of an inch or 3mm thick. As its the waxy type of potatoes you can leave the skin on.
- Mince a few garlic cloves until you get 2 heaped teaspoons of garlic. Finely chop 2 shallots.
- Put 200ml of whipping cream and 200ml of milk in a pot together with the garlic and shallots. Add 1t salt, 1t cumin, and 1t tarragon and bring to a boil.

- Arrange the potato slices into the pot, vertically as best you can. Add 1T of sherry and simmer for ten minutes, stirring gently occasionally to nudge apart any slices stuck together. Then allow the pot to cool.
- In the meanwhile butter a 2 quart sized (i.e. holds 8 cups) casserole, preferably one with a cover. Preheat your oven to 175oC (350oF).
- When the pot has cooled and the liquid within has visibly thickened, layer the potatoes a slice at a time into the casserole dish using a table spoon. Ensure each slice is coated in cream and take care to minimize any empty spaces. Spoon any remaining sauce, there shouldn’t really be much left over, over the top.
- Cover the casserole and cook in the oven for 25 minutes. If you don’t have a proper cover, just use foil snugly crimped over the top edges of your casserole dish.
- In the meanwhile grate 40g of parmigiano-reggiano.
- Take the casserole out of the oven, but leave the oven on. Using a spatula, press down on the potatoes firmly to compress them. Sprinkle the grated cheese evenly over the potatoes. Return the casserole to the oven uncovered and bake for a further 15 minutes, or until you see a nice golden cheese crust.
- You may serve your gratin dauphinois in the casserole or in square cake-like blocks on the plate with the main dish.
Notes 
- The boiling in the pot allows the cream and milk to interact with the starch of the potatoes, so it thickens before you begin layering. This is the only way the slices will be coated properly. If you are thinking to skip a step and arrange the raw potato slices in the casserole to do all the cooking in one shot in the oven, it won’t work. The potato slices will end up stacked together as if they weren’t sliced at all and all you end up with is boiled potatoes.
- Also you can’t just pour the potatoes and cream from the pot into the casserole in one go. There will be too many gaps and all the liquid will end up at the bottom.
- Gruyere is the other cheese commonly used to top off this dish. You can also try a combination of both gruyere and parmigiano.
- You can do most of the preparation of your Gratin Dauphinois ahead of time, up to the point you have baked the casserole the first time and compressed it. You can even keep the casserole in the fridge overnight. Continue with the cheese and final bake when it’s dinner time.
- Although I’ve suggested waxy-type potatoes because they hold their structure better, if you decide to use starchy-type potatoes, remember to peel the potatoes before slicing them.
- Pommes Dauphine is a deep fried cheese ball, a different thing altogether; just in case you got confused.
Tags: Cheese, Cream, French Cuisine, Parmigiano-Reggiano, potato, Sherry
This is my 20 page guide to cakes from around the world. The countries these cakes, pastries, pies and desserts come from include France of course, and Italy, Germany, Great Britain, Austria, Japan and America. With it you’ll be able to name your cake and eat it too. With the guide they’ll be no more not knowing the name of the cake you just ate or wondering how you are ever going to order it again.
Sample of one of the pages

The PDF was actually made for another of my blogs, but since it is related to food I thought it would fit right in here. Don’t expect anything too fancy or detailed; a lot of it is just cut and paste from here and there on the internet, but it’s put together everything in one place and does the job.
Download PDF of Kobi’s Cake Guide version 2.3
Tags: American Cuisine, Cake, French Cuisine, Italian Cuisine, Japanese Cuisine, Pastry, Pie, Puff Pastry
(serves 4 – 6)
This recipe pairs Scallops with its traditional complimentary ingredients, such as mushrooms, wine and cream, a combination that is sure to be a crowd pleaser. Searing on a flavoursome crust is a great enhancement to pleasant but somewhat monotonous scallop flesh, but somehow when you sear scallops at home it never turns out quite right. To make seared scallops to restaurant standard there is no complicated technique involved. All you need is the right ingredients and the proper procedure ….
Ingredients
- Large Scallops (18)
- Onion (1)
- Mushrooms (200g)
- Garlic (1T minced)
- Mustard
- Coriander Seed Powder
- White Wine (0.33 cup)
- Cream (0.5 cup)
- Tarragon
- Butter
- Lemon
Preparation
- Defrost your scallops ahead of time.
- Prepare a brine of 1T salt, 1t sugar, the juice of a wedge of lemon in two cups of water. Place the scallops in the brine for twenty minutes. Do not go beyond twenty minutes or the scallop flesh will become too salty.
- Rinse the scallops and wrap them in a tea towel to dry them as much as possible. Leave them there until step 7.
- Julienne the onion and dice the mushrooms into 1cm pieces. Mince a few cloves of garlic.
- Fry the onion pieces in a pan on a low fire with a dash of oil until they are limp, but not caramelized. Add 1T of minced garlic and stir fry for 1 minute further.
- Turn the heat up and add the wine, followed by the cream and 1t mustard, 1t coriander seed powder and 0.5t sugar. Stir till the mustard melts away and then add the mushrooms. Simmer until the liquid dries off enough to produce a thick sauce. Sprinkle on black pepper and salt to taste to complete your duxelles sauce.
- In a different pan melt a large knob of butter on high heat. When the pan is really hot and the butter darkens a bit, place half the scallops in the pan, and keep them cooking on the same side. Move the scallops around in a circular motion one at a time with tongs but do not flip them. Add more butter if the pan begins to dry. When you notice the searing along the bottom edges flip each scallop over and repeat the procedure until the other side gets seared too, then remove the scallops onto a plate temporarily.
- Sprinkle a pinch of tarragon on to the mushroom duxelles and begin reheating it.
- Do the same as step 7 for the second batch of scallops after adding a new knob of butter. When this lot is done, turn the fire off and add the first batch of scallops back into the pan. Stir fry for a short while with the fire off to coat the sides of the scallops. This will also serve to warm up the first batch.
- Spoon some of the duxelles sauce on each plate to form a bed for the scallops and then arrange three (or four for four servings) scallops on each bed. Serve immediately.
Notes
- There is no point in buying fresh scallops, the frozen ones will do nicely. You should however buy the more expensive ‘dry’ (not to be confused with dried) variety that are frozen without additional processing. You can identify these by their colour, which is ivory white. ‘Wet’ scallops are those that have been soaked in sodium tripolyphosphate to bloat their size. Thus type of scallop is toothpaste white because of the bleaching effect of the phosphates, and they shrink when cooked anyway. If you are unsure, you can’t go wrong with scallops from japan that come in a paper box.
- Do not skip the brining. This is essential for two reasons. Firstly, it is the only way to put taste inside the scallop instead of on its surface; this is very important for big scallops. Secondly this removes extra water from scallops; if there is too much internal water, the scallops will get fully cooked and rubbery before they even start searing.
- You cannot use vegetable oil to sear the scallops. Butter contains impurities which starts the browning process.
- I did not specify a cooking time because this will vary with the thickness of the scallops and how well you like them cooked. I like to cook my scallops medium like steak so they don’t shrivel up, but its up to you. Use a lower fire and pan fry for longer if you like your scallops more cooked.
- I made the diced potatoes in the photo separately, and they are not part of the recipe per se.
Tags: Butter, Cream, Mushroom, Onion, Scallops, Seafood, Wine
(serves 4)
This is a minimalist Provencal Lamb Casserole which is easy to prepare and its hearty ingredients are perfect for cold weather meals. The lamb is braised in a white wine and anchovy stock while the gamey flavour of the meat is tempered with lots of garlic and herbs. The other main ingredient of this rustic Mediterranean dish is eggplant.
Ingredients 
- Lamb Belly (500g)
- Eggplant (1)
- Shallots (6)
- Garlic (2 bulbs)
- Anchovy In Oil (25g)
- White Wine (3/4 cup)
- Bread (2 slices)
- Flour
- Worcestershire Sauce
- Mustard
- Pesto
- Oregano
Preparation
- Peel the garlic bulbs into cloves and peel the shallots but leave them whole.

- If your lamb belly doesn’t come as cubes, cut them into cubes. Put the lamb into a zip lock bag and spoon in 2T(heaped) of flour. Shake until the lamb is evenly coated in the flour.
- Heat up a frying pan with 3T of oil. Brown the lamb in the pan a few pieces at a time and then arrange the pieces of meat into a casserole dish.
- Push half the garlic cloves and all the shallots snugly between the pieces of meat as shown.
- Pan fry 25g (about 1T) of anchovy in its own oil, in the same pan you used to brown the lamb without washing it. Mash us the anchovy until it is a fine suspension and deglaze with 3/4 cup of white wine. Add 2T of pesto, 1t of worcestershire sauce, 1t of sugar, 1t mustard and 1t of oregano. Pour in 1/2 a cup of water. Bring to a simmer for 1 minute. This will be the braising liquid.
- Preheat the oven to 200oC (390oF).
- Pour the braising liquid into the casserole.
- Slice the eggplant and arrange the slices over the lamb in the casserole.

- Cover the casserole and place it in the oven for 2 hours. After half an hour reduce the temperature to 150oC (300oF).
- Lightly toast 2 slices of sandwich bread. Cut the toast into mini croutons.
- Mince the remaining garlic cloves in a garlic press.
- Fry the minced garlic in a pan with 3T oil on low heat until it stops clumping together. At this stage add the bread and stir fry until the croutons are crispy and a nice shade of golden brown as shown. Leave to cool in the pan.
- With 10 minutes to go on the baking time, take the casserole out and sprinkle on some black pepper and all the garlic croutons. Return to the oven uncovered for the last 10 minutes.
- Serve the lamb in the casserole dish directly from the oven to table.
Notes
- This lamb casserole is not meant to be eaten by itself. You should serve it with a separately cooked staple, like potatoes or polenta.
- While the Provencal Style is French, it has some similarity with Italian and Greek cuisine because they all share the same Mediterranean climate.
- You can consider crushing the croutons into breadcrumbs after they cool. Its a trade off. You will lose some of the crunch of the bread, but it give a nice appealing look to the casserole. To accompany this look you can also slice the eggplant thin and arrange the slices in a ratatouille style overlapping spiral.
Tags: Braised, bread, Egg Plant, Garlic, Lamb, Wine
(Makes 30)
A Madeleine is classic French Genoise-style sponge cake that is the size of a large cookie. Miniaturizing the cakes has the desirable effect of increasing the crust to internal volume ratio. At the same time Madeleines are characterized by a moist centre with a unique rich nutty-buttery taste, although my particular version has a strong citrus kick to it as well. You can recognize a Madeleine easily because of its iconic shape, an elongated scallop shell with a ‘hump’ below. Madeleines are best served any time you are drinking coffee or tea.
Ingredients 
- Eggs (3)
- Butter (130g)
- Flour (1 cup)
- Plain Sugar (1/2 cup)
- Icing Sugar
- Lemon (1)
- Orange Marmalade (3T)
- Bicarbonate of Soda
- Vanilla Essence
This recipe does not require, but is best made using special scallop shell pans.
Preparation
- Start by browning 130g of butter. Melt the butter in a small pan on low heat. After a while white particles will appear on the surface of the liquid butter. Next the butter will start to froth. At this point immediately pour the melted butter into a second pan to prevent it from going from browned to burnt. Allow to cool.
- Spoon 3T of marmalade into a bowl to allow it to warm to room temperature.
- Grate the skin of 1 lemon to get 1t of zest.
- Whisk 3 eggs with half a cup of sugar, the lemon zest, 1t vanilla essence and a pinch of salt. Keep whisking until the mixture thickens and is foamy. This should be about 5 minutes by hand or 1 minute with an electric hand blender.

- Mix half a flat t of bicarbonate of soda into 1 cup of plain flour. Sift the flour into the egg mixture, folding the flour regularly into the mixture to prevent lumping.
- Cut the zested lemon in half and squeeze it to obtain 3T of juice. Combine the juice with the marmalade and then stir the resulting citrus syrup into the batter.
- Reserve 3T of the melted butter and add the remaining butter to the batter 1T at a time, fold each time to incorporate the butter into the batter before adding more. Rest the batter in the fridge for a minimum of one hour, covered with cling film.
- Mix 1T flour into the reserved butter and brush your Madeleine pans with this. Place the pans into the fridge as well, for a minimum of ten minutes.
- Preheat your oven to 160oC (320oF).
- Take the batter and pans out of the fridge. The batter should be the consistency of a thick milkshake. Spoon 1T of batter into the centre of each mould in your pan. Do not fill the moulds all the way to the rim (see photo above) as you need room for the batter to expand without spilling
 out.
out.
- Place the pan in the oven for about 8 minutes. The time will vary slightly from oven to oven, and it will take more time for multiple pans and less time for incomplete pans, so you need to keep watch as they bake. The first sign to look out for is when the characteristic camel humps develop (see photo on right) on your madeleines. Soon after the edges will start to brown. Take them out one minute after this.
- Flip your madeleines onto a cooling rack and dust lightly with icing sugar while they are still hot. This icing (i.e. powdered) sugar will eventually dissolve in the butter of the madeleine to form a glaze so do not skip this step.
Notes
- The Madeleine was popularized to the world by the French writer Marcel Proust who wrote about eating it and the memories it triggered. Despite its simple look, this little cake is one of the quintessential petit fours, of equal standing with the Canele and the Macaron.
- The ribbed side (facing down in the pan) will tend to darken faster than the hump side, which is the biggest challenge in Madeleine making. This is why the pans must be chilled beforehand, to help counteract this. Supplementary techniques you can try would be using the top rack of your oven or placing a (metal) baking sheet below the Madeleine pan. All this will alter the baking time, so rely on your eyes and not the clock.
- If you don’t get the camel hump, then your oven is not hot enough – or you didn’t chill your batter. If there is no hump, its not a real Madeleine.
- You probably cannot make all 30 Madeleines in one go so plan ahead to split the baking into 2 or more equal batches.
- The bicarbonate of soda is a raising agent. If you are using self raising flour, skip the bicarbonate of soda and use only half the lemon juice.
- You can stack 2 buttered madeleine trays by turning one of them ninety degrees.
- Replace the Marmalade with soft brown sugar to make ‘regular’ Madeleines.
- If you don’t have Madeleine pans, you can use mini-muffin trays, though you will end up with round cakes. Do not spoon more than 1T of batter into each depression even though they are deeper.
Tags: Butter, Cake, Egg, French Cuisine, Lemon, Marmalade, Orange
(serves 2)
Cassoulet is a hearty meal-in-one dish of poultry, pork and beans in a tomato sauce from Languedoc, in the south of France. This is my simplified method for making a Cassoulet using everyday ingredients like chicken legs and baked beans. It’s not exactly the same as what you’d find in Toulouse but I think you’ll find its a close enough imitation as long as you’re not French. More importantly my recipe only takes 1 hour to prepare and cook instead of a whole day if you were to do it ‘properly’.
Ingredients 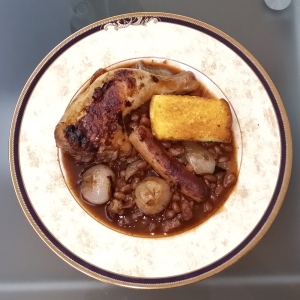
- Chicken Leg with Thigh (2)
- Pork Sausages (2)
- Pancetta (100g)
- Onion (1/2)
- Shallot (4)
- White Wine (1/2 cup)
- Baked Beans (1 can, small)
- Oxo Beef Cube (1)
- Tarragon
- Thyme
- Coriander Seed Powder
Preparation
- Peel the shallots but keep them whole. The half onion should be cut into 3 wedges.
- Trim (and retain) any excess skin and visible fat from the chicken. Season the chicken legs with a dusting of pepper, but no salt.
- Fry 100g of diced pancetta in a pan on low heat with 1T oil (goose fat if you have any) together with the chicken trimmings and the two pork sausages.
- When the fat from the pancetta begins to render, add the shallots and onions to the pan. Move the contents of the pan around to prevent them from getting burnt until the onion breaks up into soft pieces.
- Pour everything from the pan into a casserole. The Casserole should be tall enough to prevent boiling over. Drain the oil back into the pan and turn up the heat.
- When the pan is hot, brown the chicken in it. The chicken shouldn’t be in the pan so long that it gets cooked completely.
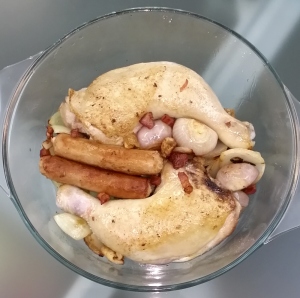
- Place the browned chicken in the casserole as well and arrange all the contents snugly as shown. Sprinkle some black pepper over everything.
- Preheat your oven to 180oC (350oF).
- Melt 1 Oxo Beef cube in 3/4 cup of hot water and use this stock to deglaze the pan. Turn on the heat again and add 1/2 cup of white wine and the can of baked beans. While the mixture is being brought to a boil, add 1T Tarragon, 1T thyme, 1t coriander seed powder.
- After the sauce has been boiling for half a minute, pour it into the casserole. Place the casserole in the oven for 25 minutes, uncovered. The cooking time may vary slightly, you’ll know its time when enough of the liquid has evaporated and the chicken is partially exposed.
- You may serve your cassoulet immediately but it can also be put aside and reheated later, it will taste just as good. It is traditional to serve the whole casserole (as per below), with the individual plating done at the table. The dish has a lot of sauce, so it goes well with baguette or some other kind of bread.
Notes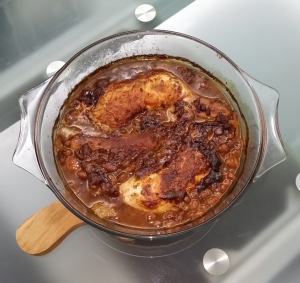
- If you haven’t cooked an authentic cassoulet before, here is a summary: Cassoulet is usually served with Duck Leg Confit instead of chicken and this is to be roasted separately. You’ll also need Toulouse Sausages which are hard to find, plus you also have to soak beans ahead of time and cook them for a really long time to get them soft. Other typical cassoulet ingredients that I left out include tomatoes, celery, carrots and laminated pork.
- The nice thing about canned baked beans is they come pressure-cooked and their sauce has the same effect as the gelatin you would normally get from cooking pork skin in the Cassoulet for a long time. Baked beans are thus the secret to the greatly reduced cooking time.
- Speaking of pork skin, if you’d like you could try adding pieces of smoked ham hock if you so desire; treat them the same as the sausages.
- Some recipes sprinkle breadcrumbs on the cassoulet to form a crust, but I don’t belong to the crust camp.
- You can use a pot or pan instead of glass or ceramic ware as long as they come with an all metal handle. Be warned – if you use an oversized sized container the liquid level will be too low to cover the chicken initially and it will get burnt. A solution is to bake the casserole covered and then again uncovered at the end.
Tags: Beans, Chicken, French Cuisine, Pancetta, Sausage, tomatoes

 Cut the lobster meat into bite sized morsels. drain off all the excess brine by leaving the lobster meat in a strainer.


 and methodically crush with the jagged face of a meat mallet. There is no need to hammer; simply press down firmly on the smooth face of the mallet head (see picture). Again, there is no need to completely pulverize the bread, you want some variety in crumb size.


